Creating & Modifying Scheduled Content
Scheduled Content is what you place on your website and in your app — a promo, a hero image, a seasonal message. Every piece carries a schedule that controls exactly when it appears and when it comes down.
How you create it depends on which surface you're working in: the Web VXE (your website) or the Mobile App VXE (your app). Both paths are below.
Create scheduled content — website (Web VXE)
You build web content on a preview of your site, inside named regions called slots.
-
Open the Live Editor. In the sidebar, go to Scheduled Content, then click Live Editor (website workspaces only).
-
Add it to a slot. Click the "+" icon in the slot where the content should appear. The Component modal opens — use the Templates tab for a new layout, or the Scheduled Content tab to reuse something you've already built.
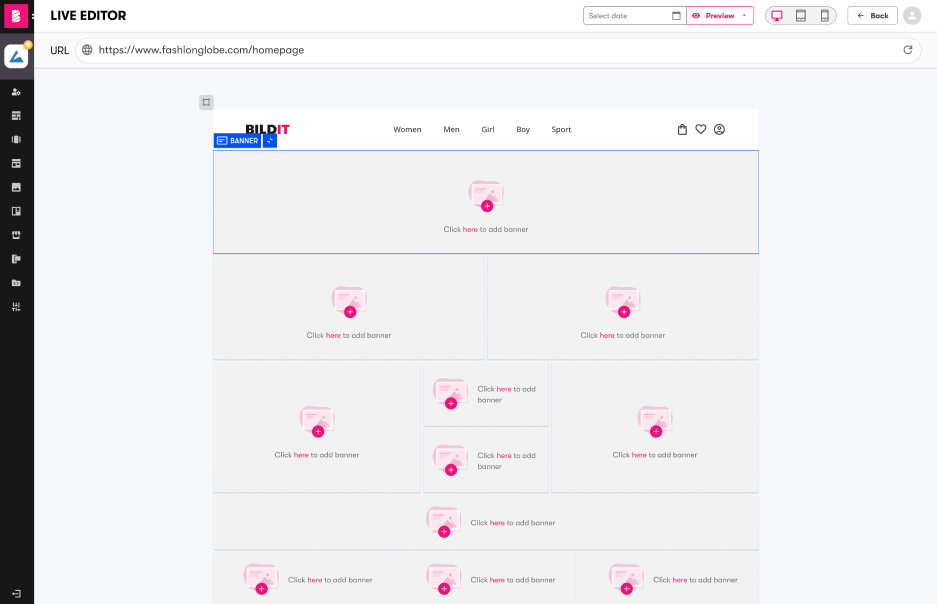
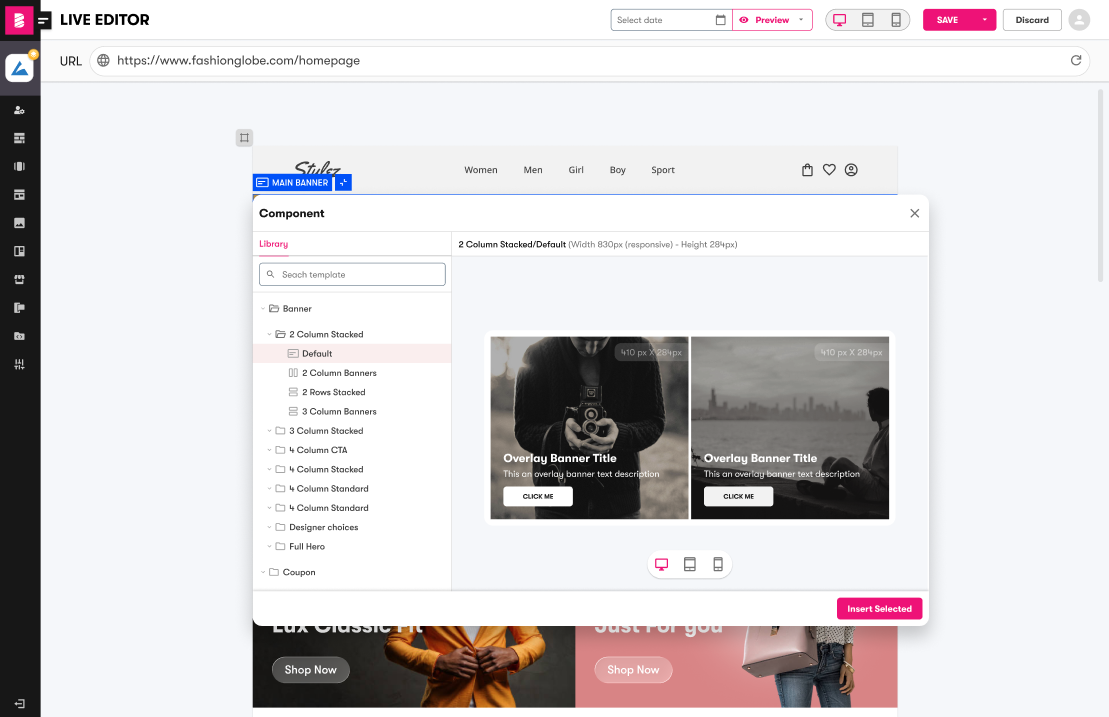
- Fill in the details (side panel, Details tab):
- Scheduled Content Name — a descriptive name you'll recognize in a long list later (see the naming tip below).
- Alternative Text — a short description for screen readers and accessibility.
- Category & Location — which page(s) it appears on: Home, product pages (PDP), product listings (PLP), or a specific URL.
- Web Slots — the region(s) of the page it fills. Your developer sets these up; you pick from what exists.
-
Make it yours. With a template, fill in each field — text, links, colors — and watch the live preview update as you type. With an image, upload it and add the click-through link.
-
Set the schedule — in the Schedules section, add a Schedule, set Online from / Online to, then use Add Schedule Order to tie the item to a slot and sort order. Details and campaign patterns in Publishing & Scheduling.
-
Preview and publish. Check it on desktop, tablet, and mobile, then click Publish (or Unpublish to take it down). It will appear according to its schedule — no site deploy needed.
Create scheduled content — mobile app (Mobile App VXE)
- In the left sidebar, select Scheduled Content.
- Click Add New (opens Create Scheduled Content).
- Fill in the form. The fields you'll use most:
| Field | What it means |
|---|---|
| Scheduled Content Name | The name of this piece of content (e.g. "New Arrivals — Spring") |
| Platform | Where it shows: Android, iPhone, and/or iPad |
| Orientation | Portrait or Landscape |
| Location | Which app screen displays it (e.g. Home) |
| Targeted customer group | Show to Everyone, Registered, or Unregistered users |
| URL/URI | Where tapping it takes the customer — a web page or an app screen (optional) |
| Campaign ID | Ties it to your campaign tracking (optional) |
| Schedule | When it's live and which slot it occupies — see Publishing & Scheduling |
- Give it something to display — one of:
- Upload an image or video — drag and drop into the upload area, pick from your Library (Select from library), or paste a Media URL. (Images: PNG, JPEG, GIF, WebP, AVIF, SVG, and related formats. Videos: MP4, WebM, OGG.)
- Use a template — fill in a pre-built layout, no code.
- Custom code — see the note below.
- Click Publish — or Save as Draft to finish later. You can also click Preview first to see it as it will appear on a chosen date.
Power users can copy a template's code (Templates in the sidebar → the ⋯ menu on a template → Copy code) and paste it into the Code tab — for example to swap an image URL in an otherwise-finished layout. If that sounds like more than you signed up for, stick with templates — they exist so you never have to touch code.
Edit scheduled content that already exists
On the web, click the pencil icon on any item to change its name, link, or schedule dates, then click Confirm:
Click Details on any item to see its schedule, link, and name at a glance without opening the editor.
Publish, unpublish, and check status
Every item shows its status — Published, Unpublished, or Draft. Use Publish / Unpublish in the side panel, or the status control in the list, to toggle visibility. Unpublishing is the fastest way to take something down right now without touching its schedule.
Reorder content in a slot
A slot can hold several pieces of scheduled content. Drag and drop them into the order you want — changes save automatically — or use the Reposition Above / Reposition Below icons for precision:
Remove or delete scheduled content
Web (Live Editor): Removing from a slot (Remove Scheduled Content) unassigns the item from that slot; the scheduled content record usually remains in your list for reuse. Permanent delete behavior depends on your workflow — confirm in the prompt before you proceed.
Mobile app: Use the trash icon on the list or detail view to delete; archived and filtered views help you manage older items.
Find content in a long list
In the Mobile App VXE's Scheduled Content list, click Filter and narrow by Location, Slots, Date, Platform, or Folder, then apply your choices. Remove one filter with the X next to it, or clear filters to reset.
"Spring-Sale-Hero-Home-2026" beats "Promo 3 final FINAL". Include the campaign, the placement, and the year — your filter searches and your teammates will both benefit.
Where does old content go?
Expired content doesn't clutter your live list forever — a daily cleanup automatically archives anything whose schedules have all ended. If something seems to have vanished, check the Archived view before you panic. Details in Troubleshooting.
Related technical docs
- Creating Scheduled Content (Web) · Managing Scheduled Content (Web)
- Create Scheduled Content (Mobile) — full form-field reference
- Image content · Custom-code content · Filtering
- Auto Archiver