Redirecting...
Airship
Using Airship requires one to:
- Set up the Airship account
- Add Airship app on mobile
- Copy Project Name, Airship App Key and Master Secret
Adding Config for Airship
From BILDIT-Visual Experience Engine go to:
- Go to Configuration from the side Menu
- Select Push Notification Config tab
- If you don't have the service configurations available you may select Create Push Service.
- Select Urban Airship on the Service you would like to add configuration
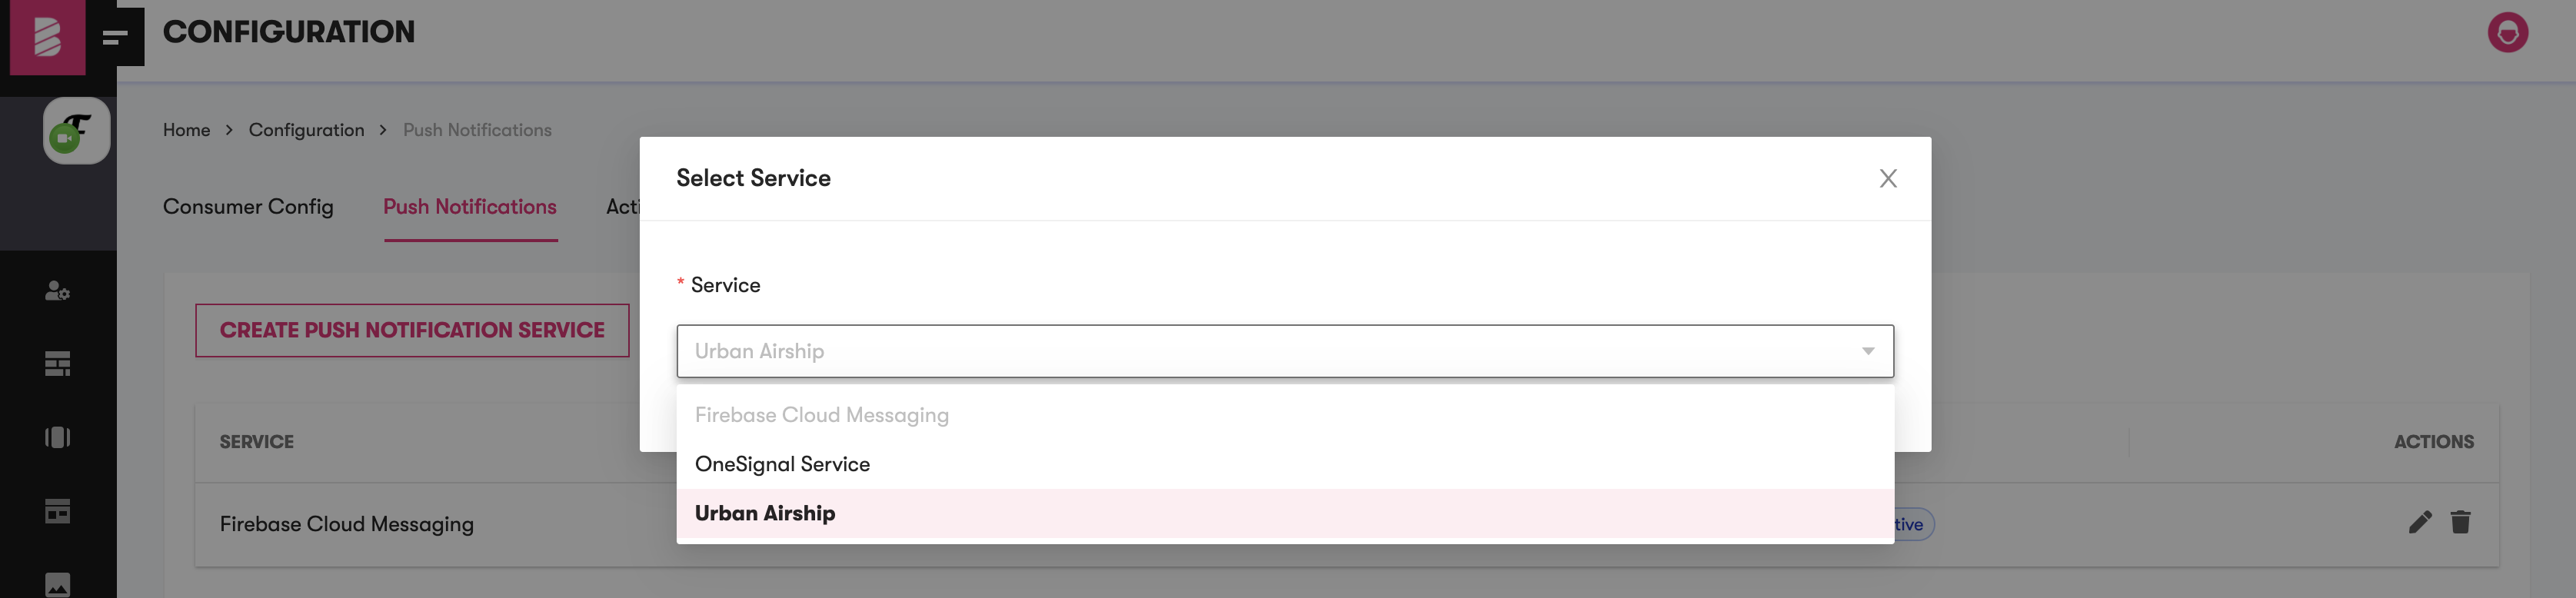
If you already have the push service configuration for the Airship, it is disabled in the dropdown list. You can either edit the current Urban Airship configurations from list or delete and add new Urban Airship configuration.
- On Selection of the service, enter the App Name as the Project Name, enter the App Messenger ID as Airship App Key and enter the App Messenger Key as the Master Secret. Airship App Key and Master Secret are copied from earlier config.
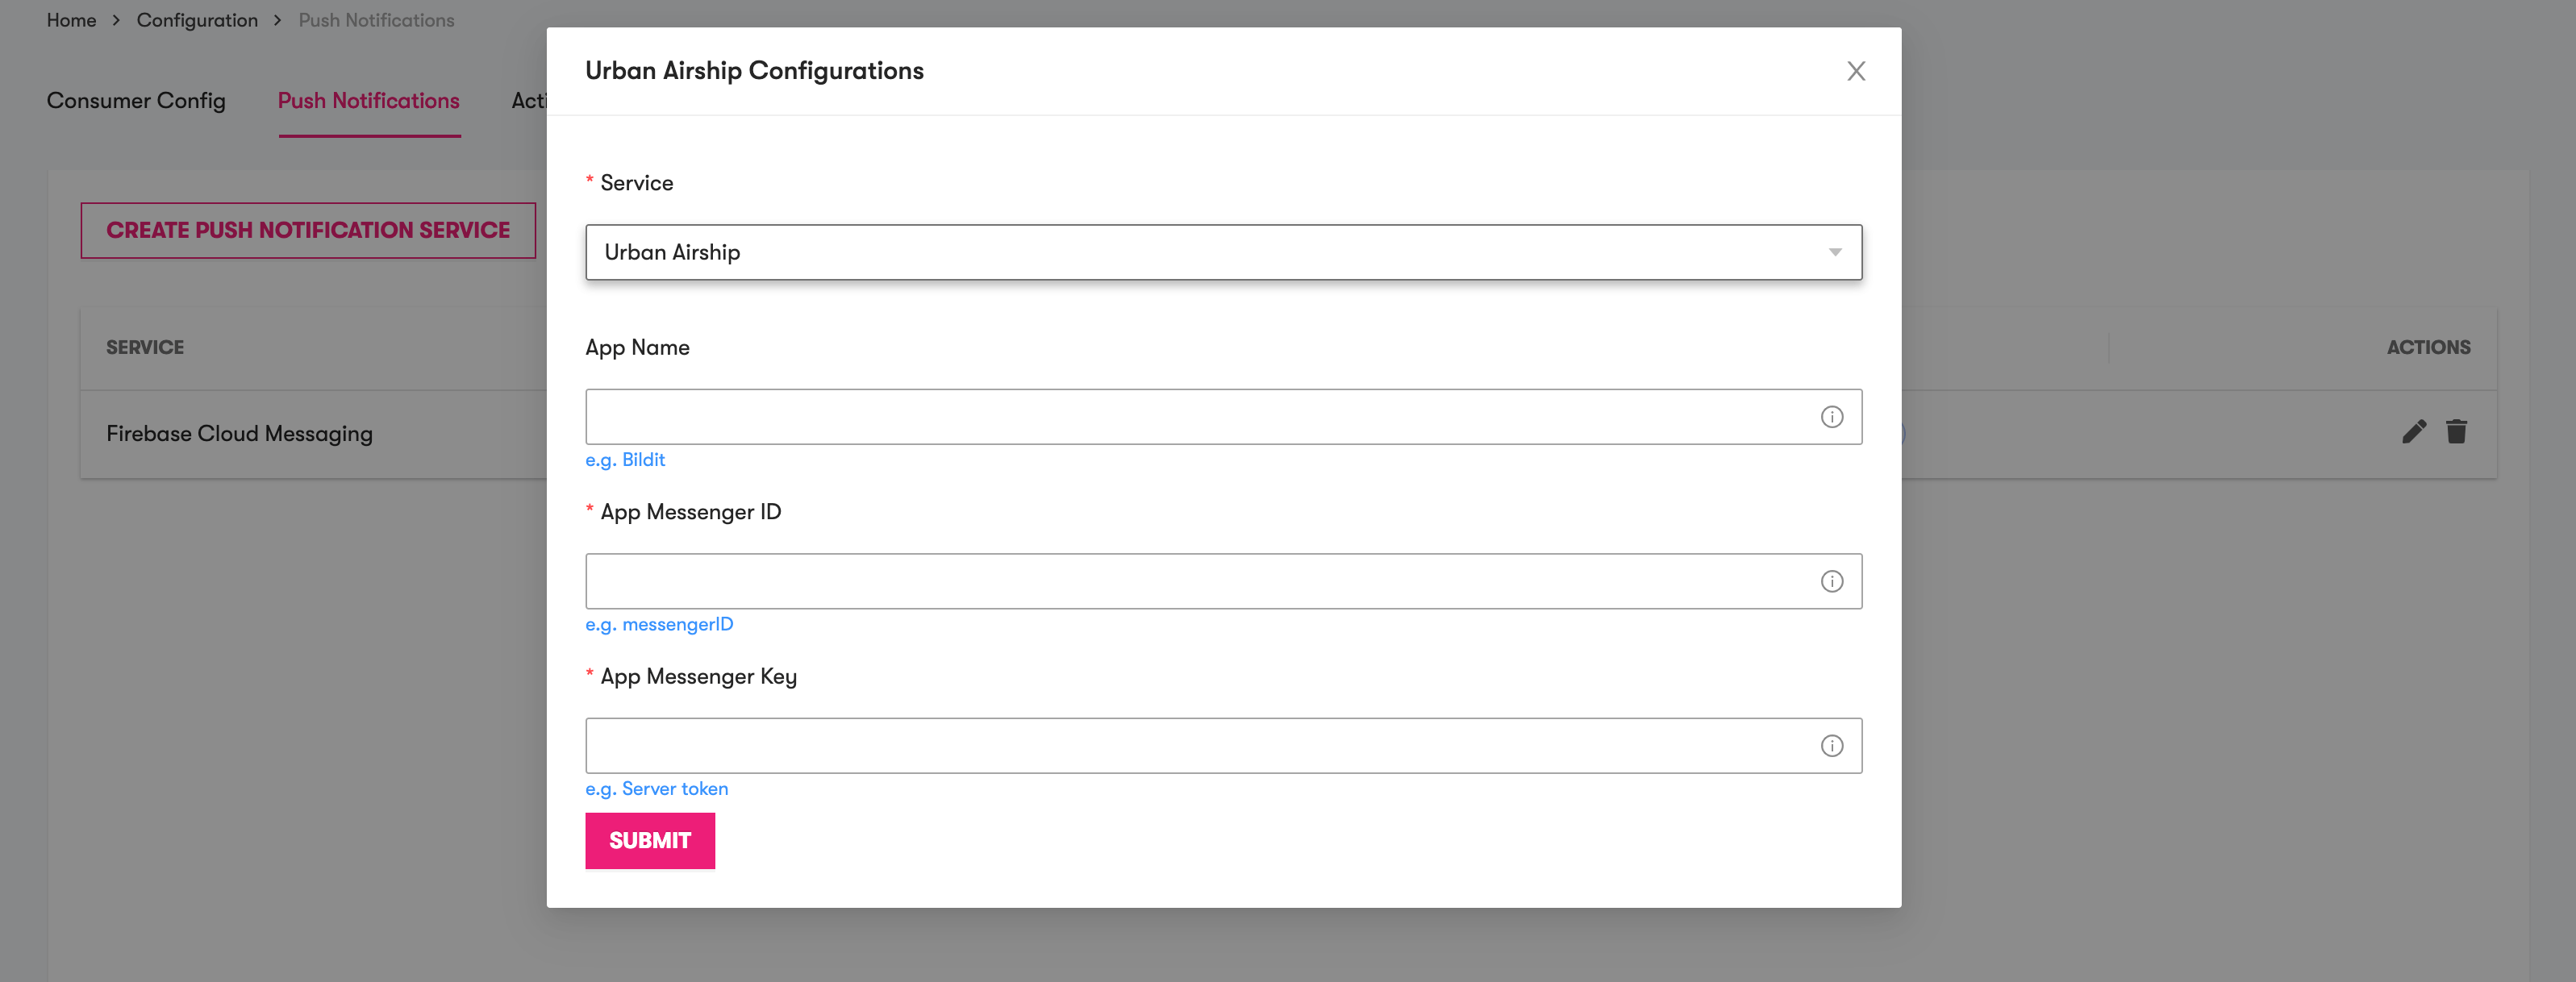
- On success, the configuration is added

Make sure that configuration is active if you have multiple configurations to use the Urban Airship service
Editing Config for Airship
After following steps one and two above, if there is already an Urban Airship push service in the list
- To edit Push Service Configuration. Click on the pencil icon from Actions.

- Airship modal will pop up with the update fields
- Make the changes you would like to update.
- Click on Submit.
BILDIT-Visual Experience Engine allows ONLY ONE configuration per service to allow consistency for the app
Setting Active Push Service Configuration
If you have list of push services, e.g., Airship and FCM, or OneSignal, or both and Airship is not the active Push Service. In this case you would wish to set it as active.
- Click on
Set Activeand on success you would notice the change with active tag.
