Remote Components
BILDIT provides the app developers with the freedom to add Remote Components to their application. By using it the application can render newer components without the need of getting updated!
How to work with Remote Components
Remote components work using H.O.C or Higher Order Component pattern, so in order to make a component remote in your application you need to use withRemote function available in Remote module of BILDIT SDK.
withRemote signature
| Parameters | Type | Description |
|---|---|---|
| localComponent | function | class | This localComponent will only render when remote component fails to load for some reason |
| remotePath | string | Provide the path for the component which you specify at the time of creation of remote component at the Visual Experience Engine For example, "Components/Button.js" |
| remoteProps | object | If you want to provide props to your remote component, you can provide them here. |
Example
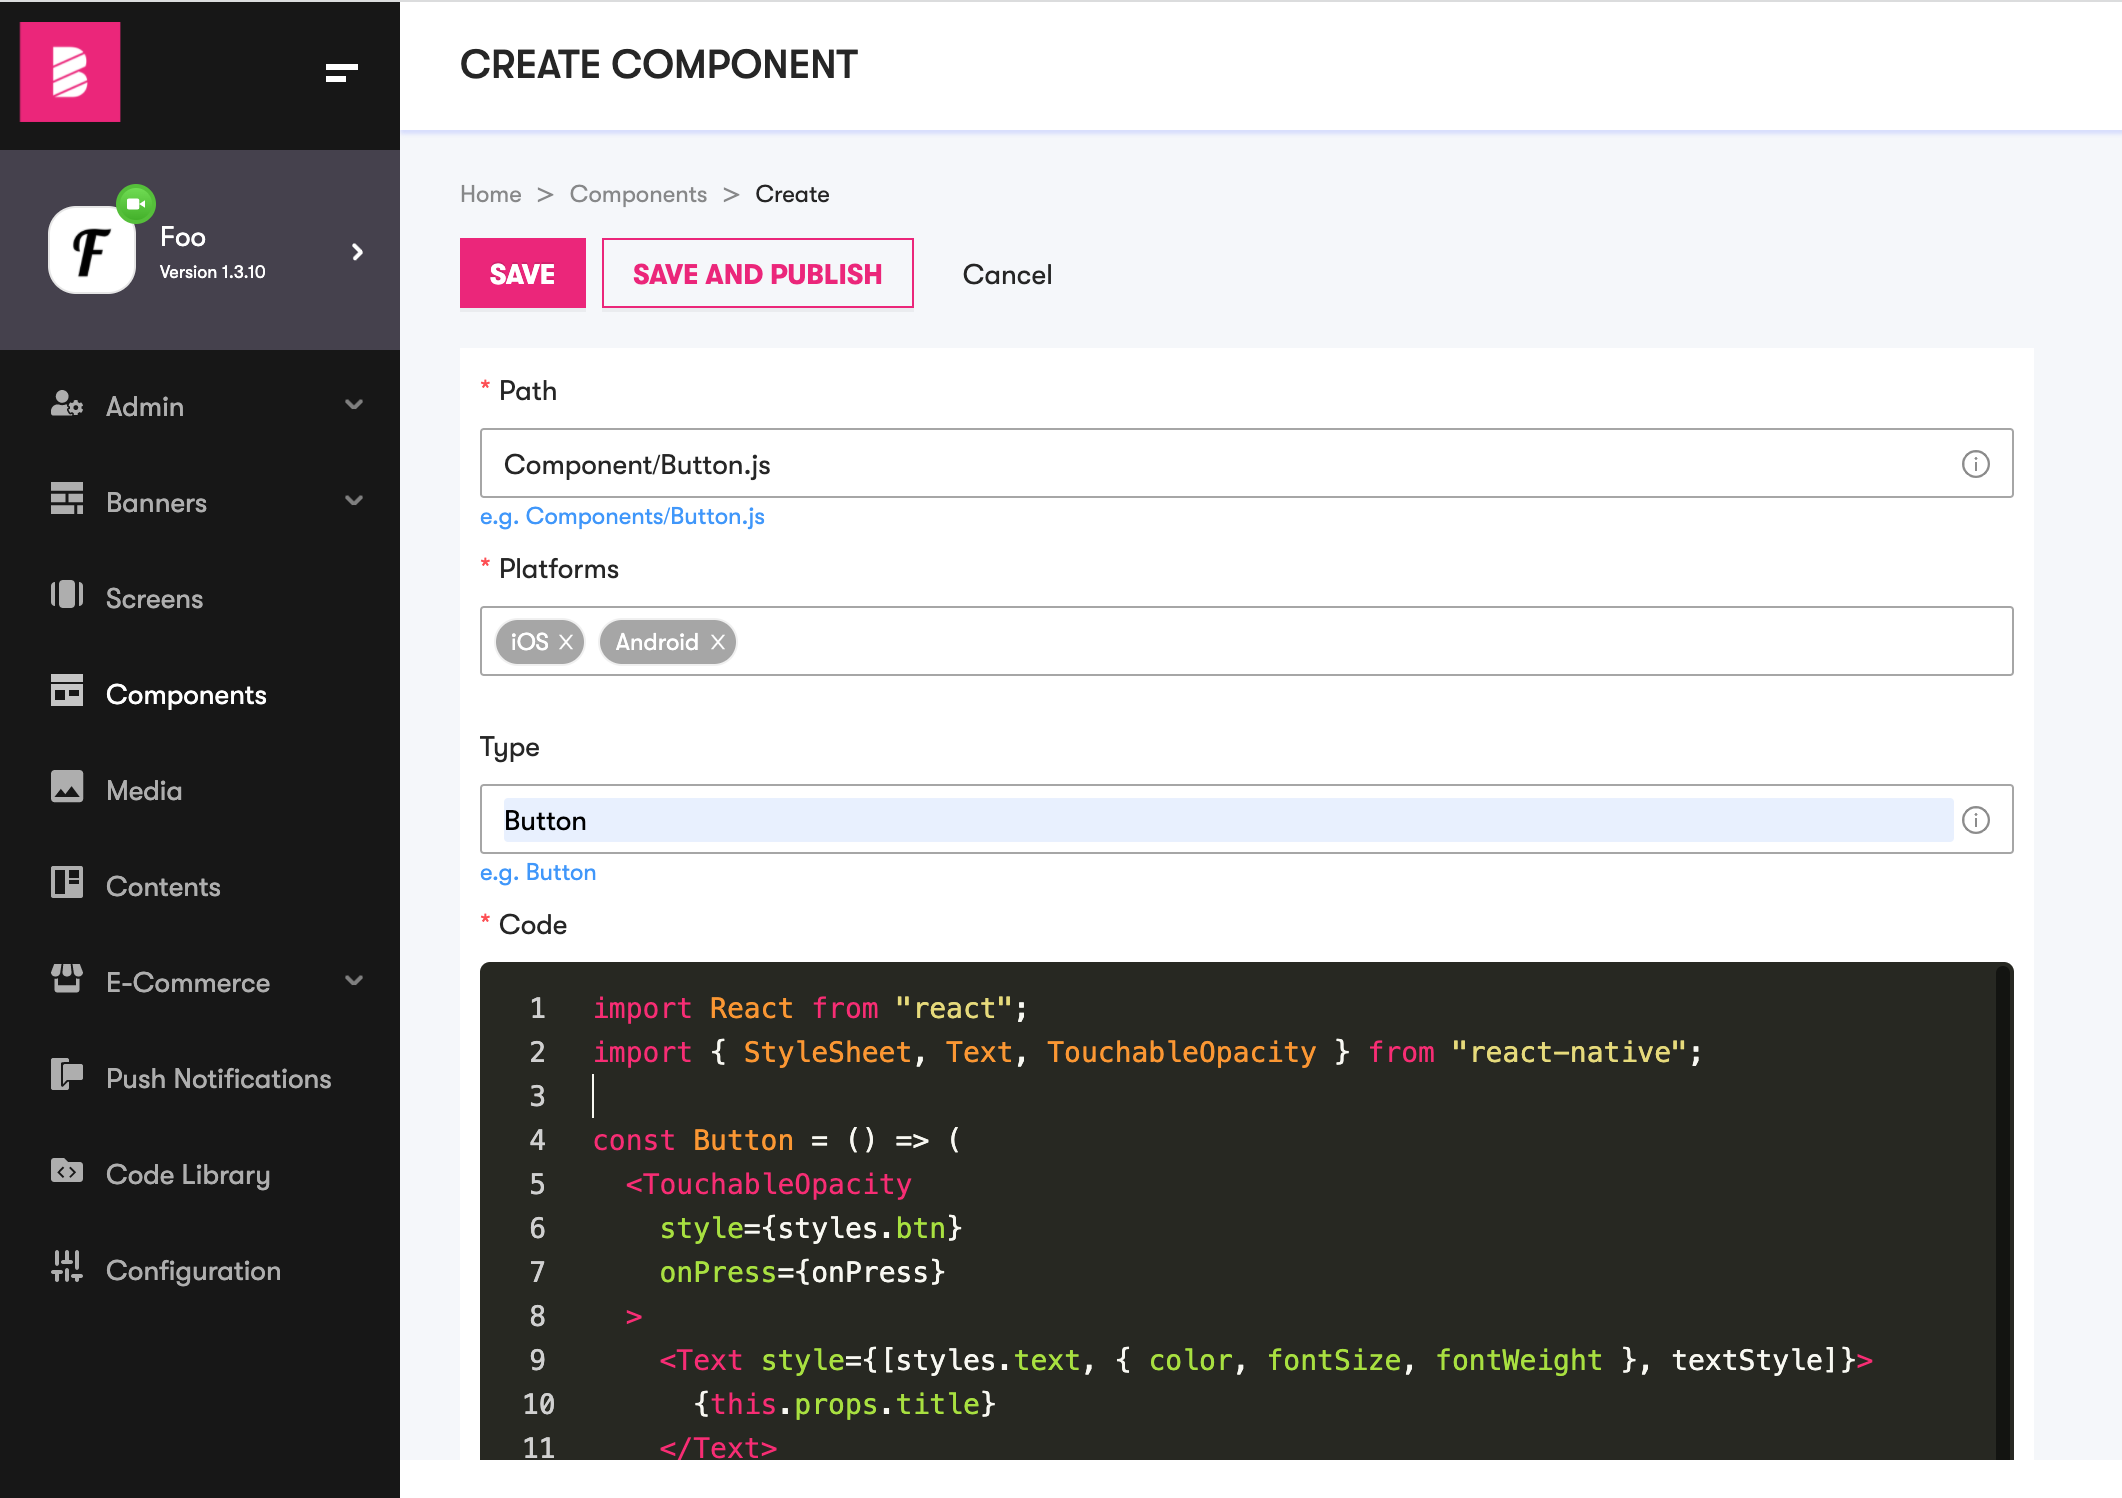
Let's assume your application has Button component which you want to be able to update even when application has been deployed. First you would go to Visual Experience Engine and navigate to components. There you might:
- Click
ADD NEWbutton where you can define Path and write React Native code along with other information. After filling the information your view might look like the image below. - Now press
SAVE AND PUBLISHbutton so that you can use your button in the mobile application.
In your mobile application add your remote-component version in the AppConfig.tsx file located at /App/Config/
...remote: {key: 'XXXX-XXXXXXXXX-XXXX',appId: 'YYY',components: {'Components/Button.js': 'v1',},screens: {...},},...
If you are using it for the first time, specify 'v1'
Now in your App make a component Button.js and wrap it with RemoteHOC, like this.
import React from "react";import { StyleSheet, Text, TouchableOpacity } from "react-native";import withRemote from '@remote/RemoteHOC'const Button = () => (<TouchableOpacitystyle={[styles.btn,{backgroundColor:"red"}}onPress={this.props.onPress}><Text style={[styles.text, { color, fontSize, fontWeight }, textStyle]}>{this.props.title}</Text></TouchableOpacity>);export default withRemote(Button)('Components/Button.js', {});...styles and other declarations...
Notice we applied red background color to differentiate from local and remote component. Now we can use this button wherever.
If user is offline or remote component fails to load he will see red button.

On successful load, the user will see the dynamically rendered component.

In nutshell, remote components make it easy to change appearance of your components at runtime.
Advanced Usage
Normally, any react component can directly import modules from node_modules. However, while rendering remote component, available modules are not known, so the component can not resolve the modules as illustrated below.

To solve this issue, you can define required modules in dependenciesMap.js located in Remote folder. For example React, React-Native and some other modules are defined in dependenciesMap.js as follows.
// DependenciesMap.jsimport React from 'react'import * as ReactNative from 'react-native'// similarly some other modules are imported here ...export default {// node_modules"react":React,"react-native":ReactNative// similarly other modules can be declared here...}
By default BILDIT supports following packages/modules.
- react
- react-native
- react-native-animatable
- react-native-elements
- react-native-fast-image
- react-native-fit-image
- react-native-image-crop-picker
- react-native-image-picker
- react-native-maps
- react-native-modal
- react-native-permissions
- react-native-scalable-image
- react-native-vector-icons/AntDesign
- react-native-vector-icons/Entypo
- react-native-vector-icons/EvilIcons
- react-native-vector-icons/Feather
- react-native-vector-icons/FontAwesome
- react-native-vector-icons/FontAwesome5
- react-native-vector-icons/FontAwesome5Pro
- react-native-vector-icons/Fontisto
- react-native-vector-icons/Foundation
- react-native-vector-icons/Ionicons
- react-native-vector-icons/MaterialCommunityIcons
- react-native-vector-icons/MaterialIcons
- react-native-vector-icons/Octicons
- react-native-vector-icons/SimpleLineIcons
- react-native-vector-icons/Zocial
If you need any package other than above mentioned, you can simply put it in the dependenciesMap.js as mentioned above. Or if you feel, you do not need package in the above list you can remove that in the dependenciesMap.js file.
In the same way you can use local components/modules in Remote Components by resolving them in dependenciesMap.js. For example:
// DependenciesMap.jsimport React from 'react'import * as ReactNative from 'react-native'import LocalButton from "../Components/Button"// similarly some other modules are imported here ...export default {// node_modules"react":React,"react-native":ReactNative,"LocalButton" :LocalButton,// similarly other modules can be declared here...}
When using local components, your Remote Component may look like this
// RemoteCode in the Visual Experience Engineimport react from "react"import LocalButton from "LocalButton"export default function Buttons(props){return (<LocalButton/>)}