OneSignal
OneSignal is the fastest and most reliable service to send push notifications, in-app messages, SMS, and emails.
Requirements
Using OneSignal requires you to:
- Setting up a OneSignal account
- Add the OneSignal app to your mobile project
- Copy the OneSignal App ID and REST API Key
You can create or log in to a OneSignal account using the links below:
You will also need a Firebase Account to use Server Key and Sender ID to create an app on OneSignal platform.
Setting up a OneSignal App
To send push notifications using OneSignal, you need to set up an app:
- Select New App / Website button to be taken to a page to create new app.
- Fill the name of the app and select the platform you would like to use. Either Apple iOS(APNs) or Google Android(FCM).
Android Setup
- On selecting Google Android(FCM) after filling out the name, you will be required to fill out the Server Key and Sender Id from Firebase.
- Select your target SDK, in our case, React Native / Expo
- Select done.
- Install the SDK to your React Native app using the OneSignal React Native setup guide:
- You can use the App ID to configure the Mobile App
- Click Done after setting up the Mobile App
iOS Setup
- On selecting Apple iOS(APNs) after filling out the name, you will be required to upload a Certificate and Certificate Password.
- Read the iOS documentation on how to obtain the above
- Select your target SDK, in our case, React Native / Expo
- Select done.
- Install the SDK to your React Native app using the OneSignal React Native setup guide:
- You can use the App ID to configure the Mobile App
- Click Done after setting up the Mobile App
Getting OneSignal App ID and REST API Key
To obtain the OneSignal App ID and REST API Key needed for BILDIT-Visual Experience Engine configuration:
- From the OneSignal app dashboard, select Settings from the top nav bar
- Select Keys & IDs from the top tab to view OneSignal keys and REST API Key
- Copy the REST API Key and OneSignal App ID that you will use to configure BILDIT-Visual Experience Engine OneSignal push feature.
Adding Config for OneSignal
From BILDIT-Visual Experience Engine, go to:
- Go to Configuration from the side menu.
- Select Push Notifications.
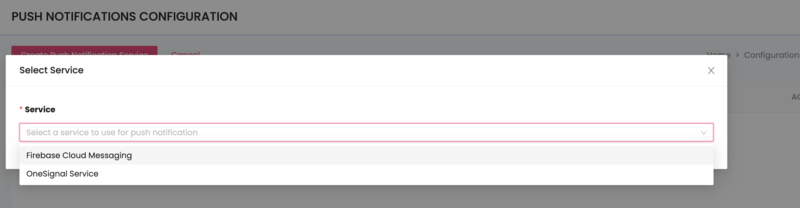
- If you don’t already have a service configuration available, click Create Push Notification Config.
- Select the service you'd like to configure.
If a push configuration for OneSignal already exists, it will be disabled in the dropdown list. You can either edit the existing configuration or delete it and create a new one.
- After selecting the service:
- Enter the App Name
- Enter the App Messenger ID as the OneSignal App ID
- Enter the App Messenger Key as the REST API Key
These values are copied from your OneSignal account.

- On success, the configuration will be added.

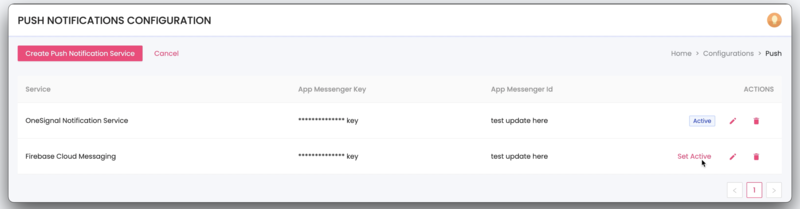
Make sure the configuration is active. If you have multiple services configured, ensure OneSignal is the active one.
Editing Config for OneSignal
If you've already completed the steps above and there’s an existing OneSignal configuration:
- Click the pencil icon under Actions to edit the configuration.

- The OneSignal modal will appear with the editable fields.
- Make the necessary changes.
- Click Update.
BILDIT-Visual Experience Engine only supports one configuration per service to ensure consistency across your app.
Setting Active Push Service Configuration
If you have multiple push services (e.g., OneSignal, FCM, or Airship) and OneSignal is not currently active, you can set it as the default:
- Click Set Active. On success, the configuration will display the Active tag.